

Recent Activity
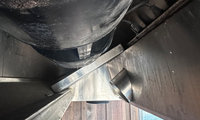
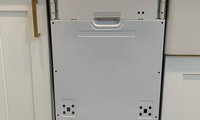

I also have this Bertazzoni Dishwasher, I also have the Cabinet Panel, but cannot figure out how to attach the door .... DW18PR
"but cannot figure out how to attach the door .... DW18PR"
- Browse to: https://us.bertazzoni.com/specifications-library-2
- Enter "DW18PR" in the Quick Search field.
- Click on the product.
- The Installation Template appears (which provides the dimensions of the panel)
- The Installation Manual appears (which shows how to attach the panel on page 23)
"pickleball can be practiced..."
I like that idea but I'd also install a basketball hoop over one of the toilets for use during a 'solo go'. Below the hoop, mount a device that would trigger the toilet lid to return the ball to the player/goer and prevent the ball from falling into the bowl.
I think you’re right to reconsider the proportions before construction gets too far along. Since this is a custom build, I’d start with the bedroom furniture placement and work the bathroom and closets around it. If you already know you don’t want the bed between windows, I’d make that a priority rather than trying to force the current layout to work. A fully scaled plan showing the windows, doors, and plumbing locations would make it much easier to suggest a practical revision.
I would surmise that replacing the blower fan has resulted in higher air flow and that before the replacement the air flow was too low.
"my ac has always struggled and basically ran 24/7"
"If i only increase airflow why does my system perform better?"
Answer from Copilot Ai:
If the blower in a split‑system air conditioner runs too slowly, the entire refrigeration cycle is pushed outside its design envelope. The immediate effect is insufficient airflow across the evaporator coil, and from there a cascade of predictable failures follows.
Core takeaway
A too‑slow blower causes the evaporator coil to get too cold, leading to icing, poor cooling, high humidity, longer runtimes, and potential compressor damage.
What actually happens inside the system
1. Evaporator coil temperature drops → frost and ice formation
Low airflow means the coil cannot shed heat fast enough. Air lingers on the coil surface, refrigerant absorbs less heat, and coil temperature falls below 32°F.
- Ice begins at the distributor or lower rows
- Frost expands and chokes airflow further
- Eventually the system enters a runaway freeze‑up condition
2. Humidity removal increases briefly, then collapses
Initially, slow airflow increases latent removal because the coil is colder. But once the coil starts icing, moisture can no longer reach the coil surface.
- Indoor humidity rises
- Supply air becomes cold but clammy
3. Temperature distribution becomes uneven
With reduced CFM, conditioned air cannot travel through the duct system at proper velocity.
- Rooms far from the air handler get little airflow
- Hot/cold spots appear
4. Compressor runs with abnormal suction pressure
Low airflow → low evaporator pressure → high compression ratio. This increases:
- Compressor amp draw
- Discharge temperature
- Long‑term wear
5. System may short‑cycle on safety limits
If airflow is too low, the coil can freeze or the heat exchanger (in heat mode) can overheat. Either condition triggers limit switches that shut the system down prematurely.
Why manufacturers specify minimum airflow
Residential systems are designed around roughly 350–450 CFM per ton. Below that range, the coil simply cannot operate in a stable thermodynamic state.
Summary
A slow blower in a split system AC is not a minor comfort issue — it destabilizes the refrigeration cycle. The consequences include coil icing, humidity problems, uneven cooling, higher energy use, and potential compressor damage.
When you replace the motor did you you clean the squirrel cage blower? That may of done it.
LOL
I am proud to say that I was the only one who answered his question.
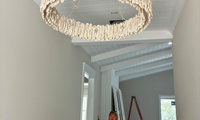
When copying a URL, just copy the text to the left of the "?", i.e., https://www.perigold.com/Worlds-Away--Rio-1-Light-Flush-Mounted-Sconce-RIO-L6117-K~P110259275.html

If you don’t like, you never will and if possible, return (or sell), but don’t paint as it’s not only the finish that isn’t great. Have you selected the furniture and accessories and if so, can you advise, so as to receive more helpful suggestions - the big picture is key.
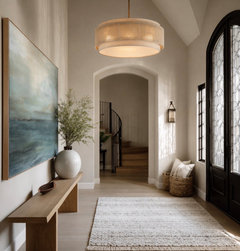
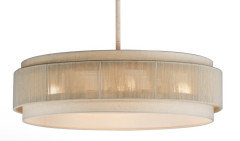

I think your instinct is right — I wouldn’t paint it. The color is part of the problem, but the scale and visual weight bother me more. In this space I’d go for something lighter and more sculptural rather than another large, heavy chandelier.
I recently compared 8 unusual moon-inspired lights, including pendant options and some much more minimal designs. It might give you a few ideas if you decide to replace this one rather than try to make it work:
Marvin makes several window collections of which the Ultimate appears to be the most expensive. However, you don't have to buy an Ultimate casement window to meet egress requirements. For example, the basic Essentials Casement CN 2640 meets the national egress requirements.* The smallest Ultimate French Casement Push Out that meets egress requirement is the CN 3648 while the smallest Ultimate French Casement is CN 4040.
-----
*National Egress Codes requires 5.7 SF clear opening. 20" (508) clear width and 24" (610) clear height, not to excess a floor to sill height of 44".
--not an expert
From CoPilot Ai:
Question: "Where is the screen located on a Marvin Essentials casement window?"
Answer:
The screen on a Marvin Essentials casement window is mounted on the interior side of the frame, not on the exterior. You remove and install it from inside the house.
Precise location and orientation
- The screen sits flush against the interior stop of the window frame.
- It covers the entire opening where the sash swings out, so when you crank the casement open, the sash moves outward while the screen stays fixed inside.
- Marvin Essentials casement screens use interior clips/springs along the perimeter. You pull the screen slightly inward to release it.
Why it’s inside
Marvin’s casement design (including Essentials, Elevate, and Signature) places the screen inside because:
- The sash opens outward, so an exterior-mounted screen would interfere with the swing path.
- Interior screens allow easier removal for cleaning.
- It protects the screen from weather exposure.
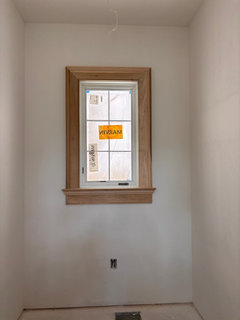
Here is a picture of a Marvin Ultimate casement window in a house I am building. I don’t have the paperwork with me to see which “opening” type it is, but I expect the screen set up is the same in everything but the push out type. You can see that the screen is inset above where the crank will ultimately be attached.

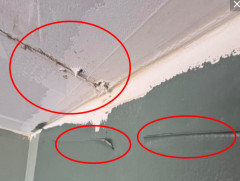
"it is not wallpaper. They said its very thin sheetrock mud..."
The material I labeled "Wallpaper torn off wall" above is "sheetrock mud"?
Were you the first owner of this home, or did you buy from another owner?

Tell us the story behind this mess. Did you do anything here? Are you a new owner trying to fix someone elses problems?
The white is the ceiling? What happened to it?
Is this "wallpaper" problem everywhere or just this wall?
The more info you share, the more helpful we may be.
From "Sherwin Williams Greek Villa: Undertones, LRV, & Real-Home Results"
"WHAT ARE GREEK VILLA’S UNDERTONES?
"Unless you have a TRUE white paint color, you’ll find undertones in any white you choose, it’s just a matter of choosing the undertone you and your home can live with! And because Greek Villa is a warm white, it has a yellow undertone...
"GREEK VILLA VS. SHERWIN WILLIAMS PURE WHITE
"These two are apples to apples as far as depth goes. With an LRV of 84, Greek Villa and Pure White are both soft, warm white paint colors. Where you see the difference is in temperature. While they’re both warm whites, Pure White is much less warm, with Greek Villa looking creamier in comparison. If you have one of the popular white quartz countertops, chances are it suits Pure White better than Greek Villa."
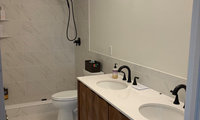
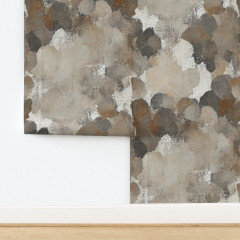
Wallpaper the space. You have a lot of tones in the room...tile, wood vanity, black and brass fixxtures. You need something to make the disparate look intentional.
Black frame pivot mirrors would look nice on a paper.
Spooflower
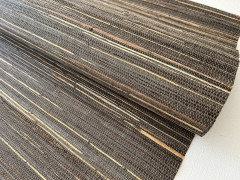
Or, something with texture, like this grasscloth (which can with stand humidity, properly installed, in bathroom with a good fan)
Turn vanity light to face down. You want bright, clear light right onto your face and the sink counter.
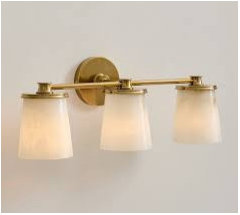
It will also reduce those shadows under your eyes, nose, mouth, neck. Have them on a dimmer, as well. As is, the lights are making the rough ceiling the star of the room. You don't want that, for sure.
If you are not interested in wallpaper, paint that area the dark of the wood vanity.
Any other siggestions? city loft looks oink. classix grey may work but is cooler
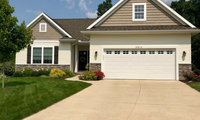
"I know there’s a better idea than plain ole brown, it just doesn’t add much to my cute little house."
Sad.
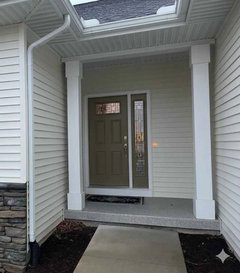
Front door painted in Benjamin Moore Buckhorn "A deep, distinguished brown with a trace of gray."

Thank you!

The Navy is very nice.
In CR's tests, the Electrolux ECFD3668AS did reasonably well, though it didn't earn a "recommended" rating. The Frigidaire Gallery Series GCFD3661AF is the same except for appearance and price. But 30" models did better; the Cafe C2S900P2MS1 earned a recommended rating and owners like it.
I have the Cafe one wdwcruise linked. Bought it a few years ago for our weekend cottage. the oven works as it should. The simmer function does not compare to my Wolf at home, i need to jeep a very close eye on it.
i rarely use more than three burners at a time. the grates are heavy and sort of a pain to remove.
Adding my biggest grip with the Cafe is the keypad is super sensitive and any steam escaping fromthe oven will trigger the pad.
i consider myself a serious home cook, two meals a day regulalry, three on the weekends
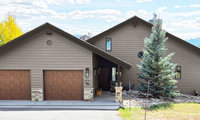
CR tested wood stains and the appearance of nearly every semi-transparent wood stain was rated poor after two years. Some performed poorly after only one year. The only recommended semi-transparent was Olympic Elite Advanced Stain + Sealant in One Semi-Transparent. Solid wood stains performed much better.

First off, I really appreciate how much thought you've already put into this. You've considered things that many homeowners don't - roof color, heat absorption, light reflectance, brick, gutters, and how different lighting changes the appearance of paint throughout the day. Those details make a huge difference.
If this were one of our color consultation projects, I actually wouldn't try to fight the architecture. I'd lean into it.
The warm brick and chocolate brown roof are already doing a lot of the visual work, so I'd choose a warm greige, taupe, or mushroom-toned body color that complements those permanent elements rather than introducing another strong color. Then I'd simplify the trim instead of emphasizing every board.
Because your board-and-batten pattern naturally creates a lot of visual movement, reducing the contrast between the field color and the trim can make the house feel more cohesive without making it look flat. You don't necessarily have to paint everything exactly the same color, but keeping the trim within the same color family can soften those vertical stripes that you're not fond of.
I'd also lean toward gutters in an off-white, cream, or medium bronze/brown rather than bright white. Since they won't be painted later, choosing a color that blends with the fascia instead of standing out will help the roofline feel cleaner. One thing we've learned after helping homeowners with exterior color consultations is that the "perfect" color chip can look completely different once it's outside. Sun exposure, roof color, surrounding landscaping, and even neighboring homes all influence how a color is perceived. That's why we almost always recommend viewing large painted samples at different times of the day before making a final decision.
I'm with All American Painting Plus in Northern Virginia, and these are some of my favorite projects because exterior color isn't just about choosing a beautiful paint, it's about creating a palette that works with the home's architecture and the elements that aren't changing.
For what it's worth, I think your instincts are right to avoid a minty green if you're hesitant. A warm, earthy greige or muted olive with restrained trim contrast would likely age beautifully with your roof and brick while keeping the home comfortable and timeless for many years.
I think I like Downing Earth better! https://www.buildersservicecompany.com/how-to-plan-an-exterior-remodel
From Copilot Ai:
Question: "How to prepare interior garage drywall for repainting after 20 years?"
Answer:
The short answer: after 20 years, you must treat the garage drywall as a degraded substrate—expect accumulated dust, oxidized paint, minor cracking, and possible moisture staining. The correct prep sequence is: deep cleaning → mechanical abrasion → defect repair → spot-priming → full priming → repainting.
Below is the full, structured, technically precise workflow tailored to an interior garage environment (temperature swings, vehicle exhaust particulates, and high dust load).
1. Initial assessment (5 minutes)
You’re looking for:
- Peeling or flaking paint → indicates poor adhesion or past moisture.
- Hairline cracks at seams → tape fatigue.
- Yellow/brown stains → water intrusion history.
- Chalky surface → oxidized latex paint.
- Efflorescence (white powder) → moisture through masonry walls adjoining drywall.
This determines how aggressive the prep must be.
2. Deep cleaning (critical step)
Garage walls accumulate hydrophobic grime (vehicle exhaust, oils, fine dust). Paint will not bond until this is removed.
Use this sequence:
- Dry dust removal: Vacuum with a brush head.
- Wet cleaning: Mix TSP substitute (not real TSP; modern paints dislike phosphate residue) in warm water. Wash walls with a microfiber mop or sponge. Rinse with clean water to remove surfactant residue.
- Degreasing: For visible oil spots, use Krud Kutter Original or Simple Green; rinse thoroughly.
Let dry overnight.
3. Mechanical abrasion (sanding)
After 20 years, the paint film is oxidized and must be reprofiled.
- Use 120–150 grit on a pole sander. Goal: remove gloss, knock down bumps, and expose sound substrate.
- For chalking: sand until the surface no longer leaves residue on your hand.
- For peeling edges: feather with 100 grit, then finish with 150 grit.
Vacuum again.
4. Repairing defects
Drywall dents, dings, and screw pops
- Re-seat any popped screws.
- Fill dents with lightweight joint compound.
- Sand smooth with 180 grit.
Cracked seams
If the tape has failed:
- Cut out loose tape.
- Apply new paper tape (stronger than mesh for seams).
- Two coats of joint compound, sand between coats.
Water stains
If stains are present but the drywall is structurally sound:
- Spot-prime with oil-based stain blocker (BIN or Kilz Original). Latex primers will not block tannins or rust bleed-through.
5. Priming (non‑optional after 20 years)
Even if the old paint looks “fine,” the surface chemistry has changed. Primer is mandatory.
Choose based on condition:
If walls are sound, no stains:
- High-quality latex bonding primer (e.g., Benjamin Moore STIX, Zinsser 123).
If there is chalking, old glossy paint, or unknown paint type:
- Acrylic bonding primer (STIX is best-in-class).
If there are stains or past moisture:
- Oil-based stain-blocking primer (Kilz Original or BIN shellac).
Apply one full coat. Let dry per manufacturer spec (usually 1–4 hours).
6. Repainting
Garage interiors benefit from paints with higher durability and washability.
Recommended:
- Acrylic latex in eggshell or satin (flat shows dirt too easily).
Two coats, with 2–4 hours between coats.
7. Optional upgrades
Add corner protection
Install metal or PVC corner guards on outside corners to prevent future chipping.
Seal gaps
Use paintable acrylic caulk at trim, baseboards, and penetrations.
Improve light reflectance
Use light gray instead of pure white; hides scuffs better but still brightens the garage.
8. Summary workflow (chronological)
- Vacuum dust.
- Wash with TSP substitute; rinse.
- Degrease spots.
- Sand entire surface (120–150 grit).
- Repair dents, cracks, tape failures.
- Spot-prime stains.
- Full prime coat.
- Two finish coats.
I depends on what you consider a paint company. There are many fine independent people who paint. Some are a husband and wife team, others may be friends who paint together. It is hard to say exactly but they may be a better deal than a "professional" paint company.
We used a local painter with a very good reputation and good reviews. We first used them to drywall and paint the inside the garage. We eventually used them to paint the stair well and hall and finally our bedroom. I feel they did an excellent job.
Depending on the job, you may wish to insure they carry insurance to cover accidental damage and liability, and coverage if they get hurt on the job.
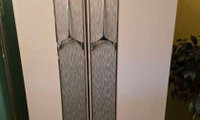
" replacing a couple of cabinets, having them painted, replacing appliances and counters"
You're going to replace brand new cabinets, appliances, and counters in a brand new kitchen in a brand new house?
I see your situation with upgraded choise limits you don't see the added value of. Talk to the builder about not installing things you'll want to replace for a credit.
Production builders will not agree to not install certain items and no way will you ever get a credit! My parents have built 4 houses with production builders (NJ and FL) and even when you tell them you will pay for it, but don't want it, they will still insist on installing it. And my Dad is a good negotiator. There is no reasoning with them!

Mrs Pete: "That's not particularly realistic."
It sounds like he's going to cut a bunch of identical stencils, attach them all to the wall, and then do the masking/painting. But what he wrote, "Then remove the islands leaving the fine lines behind and paint pretty much the whole wall with mask, then remove the fine lines leaving the whole wall masked except for the fine lines" doesn't make sense to me. The foil plan seems to have been discarded.

It would be quicker and more accurate to 3-d print the line pattern on a thin paintable substrate, spray it with gold paint, and adhere it to the wall the way you'd install a wood lattice. Adhering foil is difficult even for pros.

Yes as it it mixes air into the water, making it into smaller streams and thus reducing splashing.
But the real advantage is that it makes the stream much stronger with the same amount of water. If I remove the aerator from my bathroom faucets, the stream is barely a dribble. Replace the aerator and the faucet is again usable. An old faucet may be a real water hog if allowed unconstrained flow.
In CR's tests, the Cafe CTD70DP2NS1 performed better and is on sale for $2K.
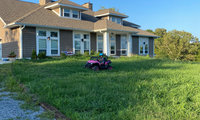
- CRRC What is a Cool Roof?
- CRRC Roof Products Directory
- What Roofing Materials are ENERGY STAR Certified?
- Energy Star Certified Clay Roof Tiles

Would check with the local building official to see if any changes to your local building code have been made. Some jurisdictions are changing the requirments for roofing particularly when it comes to color.

Metal Standing Seam and Architectural Shingle Roof
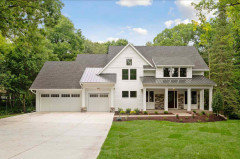
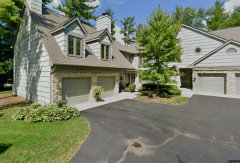
Metal Standing Seam Roof.

Architectural Shingle Roof.

GE Appliances often sells similar appliances under its multiple brands but at different prices. For example, these are nearly the same except for slight differences in shelving and appearance:
- Monogram ZWE23NSYSS 36 Inch Counter-Depth Freestanding French Door Smart Refrigerator ($4300)
- GE Profile PWE23KYNFS 36 Inch Counter Depth French Door Refrigerator ($3150)
- GE GWE23GYNFS 36 Inch Counter Depth French Door Refrigerator ($2900)
Show photos of the hood from the outside including at least one of the hood and the cooking appliance below it.
Have you checked for a plate with the model number, serial number, voltage, etc?
Tis a mystery. Are the baffles themselves less "thick" than the baffle assembly ends such that they would go under the fan housings when properly aligned with them?
is there a grease trough missing that should be positioning these differently?