9 Unexpected Design Details to Get Right From a US Kitchen Expert
You may be surprised at this designer's top tips, from pendant and microwave height to 'ceiling hoods'

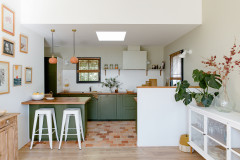
As a kitchen designer, I have developed many secrets for achieving a successful kitchen renovation. Read on for some of my tips for getting the details of your kitchen – the range hood, appliances and lighting – just right. Which one would you try in your home?
Before we get started on the details, I have one overall piece of advice: select finishes that you love, regardless of what is trending. Recently, I bumped into a previous client and asked if she still loved her chartreuse kitchen seven years later. She does, and chartreuse is still her favourite colour. Remember that trends come and go, so select the finishes that make you happy. Now, on to design tips for your kitchen renovation.
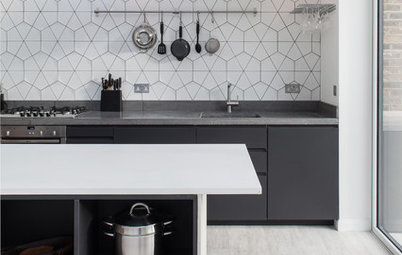
Range Hood Strategies
1. Use door restrictors
Due to the projection of some range hoods, the doors on any directly adjacent wall cabinets will hit the hood when opened if they are set back from it. To avoid dinging your beautiful cabinet doors, you have two options. You can add a restrictor to the door closest to your range hood, keeping the door from opening past 90 degrees. Or you can use a door that opens away from your range hood.

Need a pro for your kitchen renovating project?
Let Houzz find the best pros for you
Let Houzz find the best pros for you
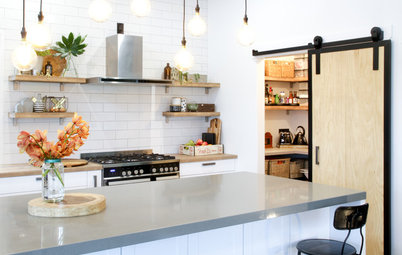
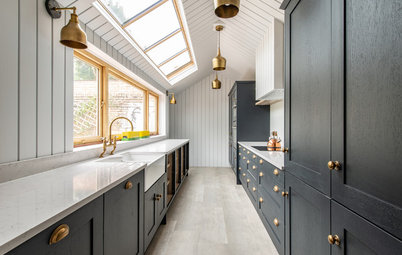
2. Consider a ‘ceiling hood’
In the past, if you had a cooktop in your island, your only choice for venting, other than a downdraft, was a range hood placed over the island. It then became a focal point, often obscuring sightlines. These days, I specify ceiling hoods to alleviate this issue.
Looking to renovate your kitchen? Find a specialised kitchen designer near you, browse images of their work and read reviews from previous clients
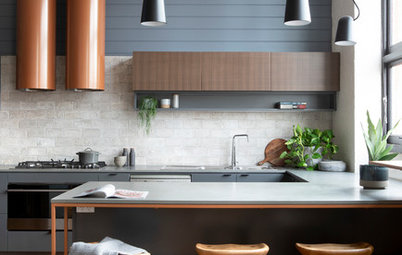
3. Select a larger range hood
If you’re not pursuing subtlety, consider an oversize range hood. A larger model will accomplish two things. First, it becomes an umbrella that can capture more grease and odour than one sized exactly to your stove or cooktop. Second, it increases the distance between the cabinets next to it, visually creating more openness.
If you’re not pursuing subtlety, consider an oversize range hood. A larger model will accomplish two things. First, it becomes an umbrella that can capture more grease and odour than one sized exactly to your stove or cooktop. Second, it increases the distance between the cabinets next to it, visually creating more openness.
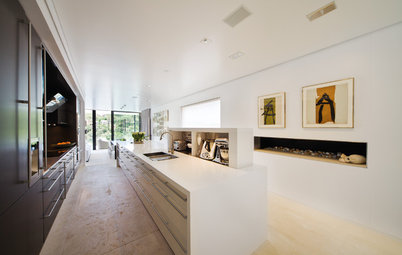
Appliance Placement
Anyone can design a beautiful kitchen, but it should also function well. Pay attention to the placement of your appliances and the spatial relationships between them.
Browse more exquisite Australian kitchens for inspiration
Anyone can design a beautiful kitchen, but it should also function well. Pay attention to the placement of your appliances and the spatial relationships between them.
Browse more exquisite Australian kitchens for inspiration
4. Get your microwave height right
Microwaves are often placed too high, and warming drawers too low. A maximum of 120 centimetres above the floor is an ideal height for a microwave for most people – unless you’re a towering pro basketball player like LeBron James!
Microwaves are often placed too high, and warming drawers too low. A maximum of 120 centimetres above the floor is an ideal height for a microwave for most people – unless you’re a towering pro basketball player like LeBron James!
5. Move the warming drawer up
There was a time when, in more generously sized kitchens, the warming drawer was routinely located beneath the double oven stack. In many ways this made functional sense, since it was near the ovens. But over time, many people stopped using them as they were so low, making accessibility a challenge. These days it’s all about function. Consider placing your warming drawer, if you choose to have one, at bench-height and close to your cooking appliances.
Tip: If you’re opting for a single oven instead of a double oven stack, it can also work nicely to position a warming drawer directly below it.
Lighting Solutions
6. Uplighting
Not all cabinetry goes to the ceiling. In the past, it was common to add a soffit to fill the gap between the top of your upper cabinets and the ceiling, but not everyone likes the look of a soffit.
Uplighting creates a source of ambient kitchen lighting when the space above the cabinetry is left open. One caveat: the light reflects best off the ceiling when there’s a minimum space of 30 centimetres between the top of your cabinetry and the ceiling; otherwise it can create a halo effect above the cabinets.
Tip: LED strip lighting is effective at avoiding the halo effect and providing an even distribution of light.
7. Pendant height
I wish I could tell you the ideal height for island pendants, but it doesn’t exist. Consider many factors, from the pendant itself to the sightline height of the kitchen’s users. In general, pendants should be 75 to 100 centimetres above the island benchtop. Why measure from the top of the island’s bench height instead of from the ceiling? Because ceiling heights differ.
I wish I could tell you the ideal height for island pendants, but it doesn’t exist. Consider many factors, from the pendant itself to the sightline height of the kitchen’s users. In general, pendants should be 75 to 100 centimetres above the island benchtop. Why measure from the top of the island’s bench height instead of from the ceiling? Because ceiling heights differ.
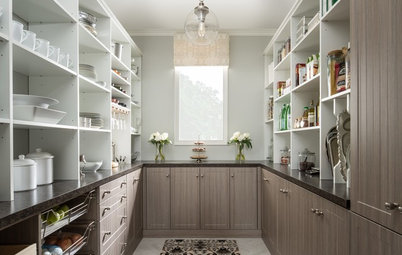
Extra Details That Count
8. Bar stools
There are many bar stool styles to choose from, but if you plan on eating meals at the island, consider a stool with a back. The back support will let you enjoy sitting there longer. A bonus would be if the stool swivels.
Tip: Bar stools that swivel often take up less room as people don’t have to push them out from the bench to sit down or stand up.
A pot filler with a spout taller than the water source.
9. Pot fillers
My old pot-filler rule was this: if I put it in, you must promise to use it. But at what height should it be placed? I recommend measuring your tallest pot and then adding about five centimetres. And before your plumber plumbs the waterline, be sure to have the pot filler on-site.
9. Pot fillers
My old pot-filler rule was this: if I put it in, you must promise to use it. But at what height should it be placed? I recommend measuring your tallest pot and then adding about five centimetres. And before your plumber plumbs the waterline, be sure to have the pot filler on-site.
Pot filler with a downspout.
Pot fillers come in different configurations. Some have a spout that is taller than the water source, while others have a downspout and require the waterline to be placed higher.
Pot fillers come in different configurations. Some have a spout that is taller than the water source, while others have a downspout and require the waterline to be placed higher.
Your turn
Which details lifted the style or function of your kitchen redesign? Tell us in the Comments below. And while you’re at it, like this story, save the images and join the renovation conversation.
More
Want more practical tips? Feast your reno-hungry eyes on this article: Planning a Knockdown-Rebuild? Don’t Forget These 9 Costs