
Decorating

Clever Storage: The Magic of Magnetic Racks
Use the power of magnetism to corral your knives, tools, gadgets and more

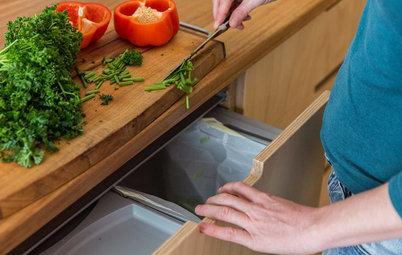
Looking for more bench space without renovating the kitchen? A cool way to display kids’ artwork without renovating the fridge? The cheap and easy answer is not magic, it’s magnets. Specifically, magnetic strips, racks and tape that offer clever, good-looking solutions for storage, organisation and clutter busting.
Before selecting the rack, determine where it will fit best in the kitchen. Knife racks can be hung horizontally or vertically, depending on the space available. For kitchens with minimal wall surface, racks can also be installed on the sides of cabinets or appliances, or on the underside of cabinets above the bench.
Measure the length of the knives you plan to keep on the rack (or simply hold up the longest ones) to get an idea of how they will fit in the space. Other considerations: easy access in prep areas but keeping them out of reach of children.
Once you have mounted the knife rack and a brief celebration has ensued, the next question is often, How to place the knives? Although there is no single correct answer, comfort and safety dictate popular options.
Depending on the height of the family chef(s), if the rack is set at shoulder level or above, knives are best positioned with handles down, tips up. This way, when someone reaches for a knife, the hand shouldn’t accidentally brush a blade or point. On racks mounted lower, the knives will be more easily and safely grasped with handles up, tips down. Personalise your setup.
In addition, lefties may consider positioning sharp blade edges facing right, and right-handers may feel more comfortable with blade edges facing left. Another safety tip: Place the longest knife on the far left, working to the shortest knife on the right. This placement minimises the amount of open blade exposed to the right of the hand as it grabs the knife on the left. Sometimes it’s the little things.
In addition, lefties may consider positioning sharp blade edges facing right, and right-handers may feel more comfortable with blade edges facing left. Another safety tip: Place the longest knife on the far left, working to the shortest knife on the right. This placement minimises the amount of open blade exposed to the right of the hand as it grabs the knife on the left. Sometimes it’s the little things.
Although it may be tempting to overstock your rack, this is something to avoid. Crowded blades may accidentally be blunted, or their edges may be chipped, if stacked heel on heel. The pull of the magnetised bar is very strong, and the knives may strike against one another with more force than expected. Select the knives you use most and stow or retire the rest.
It’s worth noting that the magnetic force is equally as strong during the rack’s installation. Once you have installed the mounting hardware on the wall, it will be time to affix the front piece. Be sure to hold the facing carefully by its sides. The strong pull of the pieces as they come together can be surprising (and slightly impressive) – trust me, you don’t want your fingertips caught in between. Ouch!
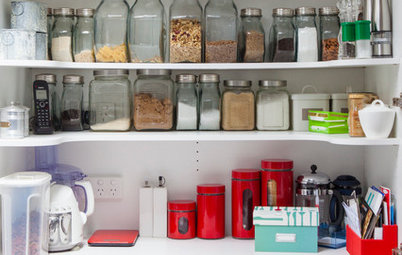
Clever kitchen storage hacks
Clever kitchen storage hacks
After a few moments spent admiring your new knife rack and gloriously empty bench, you’ll be ready for phase two: Operation Home Magnetisation.
The same concept of clearing the kitchen bench can be applied to work surfaces in craft rooms (think scissors, pins, rulers, pens) and workshops.
The same concept of clearing the kitchen bench can be applied to work surfaces in craft rooms (think scissors, pins, rulers, pens) and workshops.
Imagine never rummaging through a toolbox again!
Outdoor kitchens, grill areas and DIY home art galleries can also benefit from the installation of magnetised racks, strips or boards.
Placed end to end or stacked horizontally in rows, the magnetic pieces can be placed in an arrangement that’s tailored to suit your space and needs. Here, the homeowner uses magnetic clips to hold artwork, making it easy to manage an ever-changing collection.
Magnetic tape, available at most home improvement and craft stores, is a thick, flexible magnetised strip with adhesive backing. You simply peel and stick it. Although the possibilities for DIY and crafting are endless, one awesome application is to secure a length of tape on the inside of medicine cabinet (perhaps on the back of the door) to hold bobby pins, tweezers, nail clippers and scissors. It’s such a quick DIY, you’ll finish with plenty of time to photograph your accomplishment and post it to Houzz!
TELL US
How have you made your home more magnetic?
MORE
Pegboards That Work Their Socks Off
20 Storage Ideas That Say “Now, Why Didn’t I Think of That?”
Minimalist Storage Solutions to Hide Your Naughty Clutter Secrets
TELL US
How have you made your home more magnetic?
MORE
Pegboards That Work Their Socks Off
20 Storage Ideas That Say “Now, Why Didn’t I Think of That?”
Minimalist Storage Solutions to Hide Your Naughty Clutter Secrets


More game-changing wall storage solutions