Get Crafty: 9 Steps to Make Your Own Scented Candles
Try this fun activity that will leave your home beautifully fragrant and ambient

Hands up if you happily shell out up to $100 for a designer candle to have on show in your home? I know I’m guilty. Most of the time I have them strategically perched on top of some coffee table books, next to little posies of flowers on my bedside table, or balancing dangerously on the edge of my bath. But in displaying my candles so thoughtfully, I ironically forget to burn them most of the time. Which, needless to say, is a complete and utter waste.
Candles are meant to be savoured and enjoyed (and not just for their pleasing aesthetics). Just ask Clare Elsworth, founder and director of bbe boutique, a company that offers ‘couture’ candles. “Fragrance is such a personal thing to be enjoyed,” she explains. “Not only can a certain scent set a mood, but you can also combine fragrances in your home, just like you would on your body. I personally love layering a candle with a room spray to create a warm, welcoming environment.”
According to Elsworth, candles are fun to try making yourself, albeit a little tricky at first. She got her start after a background in aromatherapy and has been mastering bespoke creations for the past six years. Here, she takes us through the steps so you can get started on your own little sample.
There are many different varieties, but Elsworth recommends soy wax because it is clean-burning and contains no petrochemicals. “It’s like organic food,” she says. “It may be a bit more volatile, but there are no nasty additives.”
STEP 2: Choose your vessel
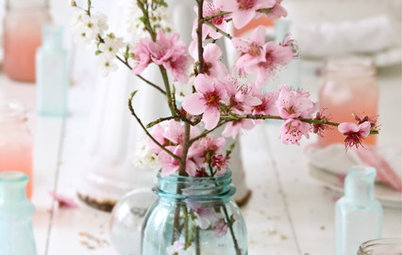
Next, you need to choose the desired cup, container or heat-proof dish you’re going to be pouring your wax into. “Whatever it is, just make sure it’s nice and clean,” says Elsworth. The most popular choice is empty glass containers. These can be printed or coloured (such as the pretty pink examples above).
Next, you need to choose the desired cup, container or heat-proof dish you’re going to be pouring your wax into. “Whatever it is, just make sure it’s nice and clean,” says Elsworth. The most popular choice is empty glass containers. These can be printed or coloured (such as the pretty pink examples above).
Or, they could be empty glass vessels leftover from previous candles.
If you have an old glass candle lying around that is pretty much used up, pour in some boiling water and allow it to soak. This easily removes any leftover wax in the bottom.
If you have an old glass candle lying around that is pretty much used up, pour in some boiling water and allow it to soak. This easily removes any leftover wax in the bottom.
If you prefer to go petite for your candle-making, then the traditional tea-light option is for you. Cases are readily available for you to buy. The most popular choices are a thick and clear option, or the standard metal variety.
STEP 3: Play around with wick width
The next step in the process is to get your wick sorted. This will be dictated by the size and depth of your vessel. “If the wick is too narrow, then your burn pool won’t make it to the edge and the candle will tunnel, but you also don’t want it to be too thick because then your candle will burn too quickly,” explains Elsworth. Unfortunately, this process can be a bit of trial and error, but it’s worth consulting the supplier on their thoughts.
BONUS TIP: Look to purchase dipped lead-free wicks.
STEP 4: Attach the wick
After you’ve decided on a wick width, cut it longer than necessary and stick it to the bottom of your vessel with melted wax. “Make sure it’s centred, otherwise it will fall all over the place when you start pouring in the wax,” advises Elsworth.
An easy way to do this is to drill a hole in a wooden ice-cream stick, then weave the wick through the hole. “Then,” says Elsworth, “sit the stick horizontally on top of the rim. Lastly, attach the end of the long wick to a peg so it doesn’t fall back through the hole.”
STEP 6: Add your fragrance
Once your wax reaches the optimum melting temperature, add your chosen fragrance oil. “I work with between 11 and 12 per cent because I’ve found that in working with soy wax, that amount gives me the maximum scent throw,” says Elsworth.
BONUS TIP: Steer clear of essential oils, because too much of a good thing can cause your candle to combust.
STEP 7: Add your colour
Once the fragrance is mixed in, add your colour (which is also available for purchase at candle-making suppliers). Stir it around so the wax cools a little.
NOTE: This step is purely optional and depends on what effect you’re trying to achieve with your candle. If you’re feeling creative, bold brights make for some pretty nifty handiwork (as seen in this outdoor shot).
STEP 8: Pour your wax
Once the wax has cooled, it’s time for pouring. If you’re using a glass vessel such as a jar, Elsworth recommends pouring a bit and then rolling it around so the wax reaches all edges of the glass. “This technique prevents air pockets,” she says.
Once the wax has cooled, it’s time for pouring. If you’re using a glass vessel such as a jar, Elsworth recommends pouring a bit and then rolling it around so the wax reaches all edges of the glass. “This technique prevents air pockets,” she says.
STEP 9: Leave your candle to rest
“Once it is all poured, let it sit there. Literally don’t move it for two days,” recommends Elsworth. “After that, trim your wick and you’re done.”
That’s really it to this whole process. But, before you head off to become the new Jo Malone, it’s important to polish up on the rules for burning candles and their maintenance.
Rule #2
Always, always trim your wick. “Otherwise you will have a massive flame belting out … and a situation like that never ends well,” says Elsworth.
Always, always trim your wick. “Otherwise you will have a massive flame belting out … and a situation like that never ends well,” says Elsworth.
Rule #3
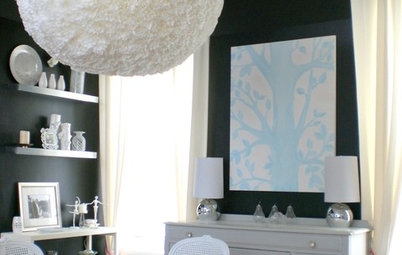
Enjoy them! Candles are meant to be burned. They particularly set a beautiful mood when you have guests over. If in doubt of configuration, take your lead from this image. Place lots of candles on a long table (mixed in with a few fresh flowers) and you have a stunning display on your hands.
Enjoy them! Candles are meant to be burned. They particularly set a beautiful mood when you have guests over. If in doubt of configuration, take your lead from this image. Place lots of candles on a long table (mixed in with a few fresh flowers) and you have a stunning display on your hands.


First things first, we’re not talking about rolling up sheets of beeswax here (although that can be a fun activity with kids). You need to purchase wax from a reputable supplier. This usually comes in flake form.