Houzz Tools: Edit Photos and Projects With Ease
Use our new project and photo editor tools to sort, label and arrange photos with just a few clicks

Our tools on Houzz make it super simple to add information to your photos. They’ll help you make each shot more discoverable on Houzz and organise photos into projects.
To access the project editing tools, first go to your project and click ‘Edit Project.’
On the edit screen, you can manage all aspects of your project and photos. Here you can edit the name and description of the project, or add other professionals who worked on the project to credit them for their participation as well.
If you would like to move photos to another project, select them, then click the ‘Move Photos to…’ button to select another project or create a new project to house them.
On the upper right side of the edit screen, you can select whether you want to view the photos within the editing tool as small, medium or large images. You may find that one view is easier to work with than another, depending on how you want to update your project.
You may also:
1. Reorder photos
To change the order of photos in your project, just click and drag them into the order you want.
To change the order of photos in your project, just click and drag them into the order you want.
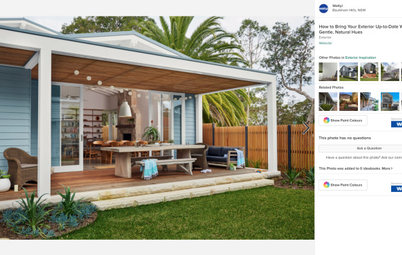
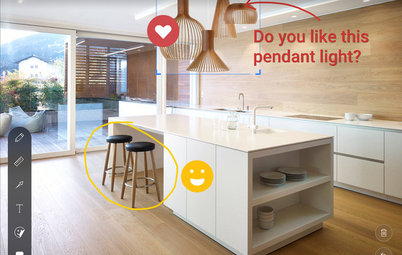
2. Edit photo descriptions and keywords
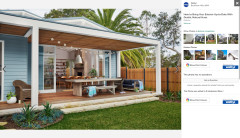
From the medium and large views, you can scroll to see all the photos in a given project in one page. You can edit all the information associated with each image, including the description and keywords (keywords are the key to photos coming up in search results on Houzz). Check the ‘Cover Photo’ box to make an image the cover photo for your project.
From the medium and large views, you can scroll to see all the photos in a given project in one page. You can edit all the information associated with each image, including the description and keywords (keywords are the key to photos coming up in search results on Houzz). Check the ‘Cover Photo’ box to make an image the cover photo for your project.
3. Edit photos not assigned to projects
Go to your profile page and click ‘Photos’ in the left-hand navigation. You will see all your photos and projects listed. If any photos are not assigned to projects, you will see a button that says ‘Manage Unassigned Photos.’ Click that button to reveal editing tools for those photos as well.
Go to your profile page and click ‘Photos’ in the left-hand navigation. You will see all your photos and projects listed. If any photos are not assigned to projects, you will see a button that says ‘Manage Unassigned Photos.’ Click that button to reveal editing tools for those photos as well.
From the unassigned photos view, you can edit the information for these photos, just as you would in the project editing view. You also can select photos to move to an existing project or create a new project for them.
For more best practices, check out our Inside Houzz section.
For more best practices, check out our Inside Houzz section.