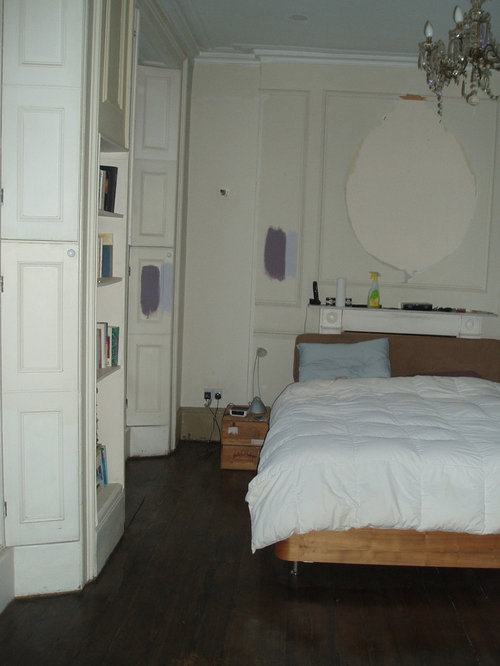
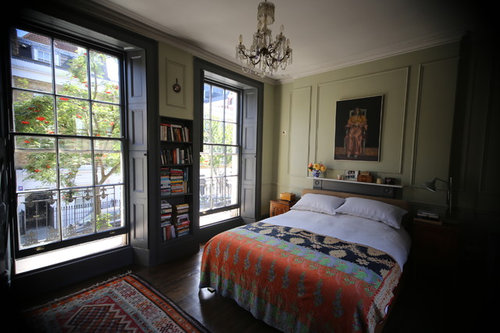
Bedroom Before and After
User
7 years ago
Featured Answer
Sort by:Oldest
Comments (16)
Related Discussions
master bedroom: how to turn empty to romantic
Comments (1)Any suggestion will b great....See MoreLook at this Before & After of a Master Bedroom in New Zealand
Comments (0)For this before and after, these clients were interested in maintaining the integrity and character of the home but incorporating modern and traditional finishes. The house featured pressed ceilings in the bedroom, which gave the room a grand appeal. This feature was retained as it was beautiful and kept the character but paired it with a more contemporary bed to modernise the space, and changed the spatial layout. We layered the bed with different colours, textures and patterns to create more interest. The light fitting was replaced with a modern twist on a chandelier. Before After Let me know what you think!...See MoreThe Ultimate Investment - Before and After
Comments (0)We began this renovation process, first looking at a range of photos of the bones of the home with our client and about her expectations and "Ultimate Investment Goals" for her project (family home or rental, long occupancy or flicking property, ideal uses, pets bedrooms required etc). We then looked at the structure of the existing home and its potential. With a few tweaks to the layout, we could gain 30sqm and by pushing the exterior wall out at the back and side on the ground floor we could gain another 40 sqm by taking a 3 bed 1 bath single car garage to a 4 bed 3 bath, two lounges and study with double garage. There where some aesthetics that benefited also - the house was brick base with nobly brown brick. Our extension removed most of this and the remainder we rendered, the upper floor cladding was leaking and had a heavy concrete tile over it by changing to weatherboard and tin (longrun) roof the loading's on the existing foundation where similar so no existing foundation needed upgrading. To give it a modern spin we used a block for the fire boundary wall and used stack bond pattern to front and back. Our client Debbie works with raw food as her job, making gluten-free vegan food, so her kitchen space was very important. With the kitchen landing close to an internal corner we decided to make it wider than normal along the back wall hiding a step in the exterior wall and helping connect the two living rooms with a Stainless bench on the island this helped to break up space and provide a central gathering point for entertaining. Finally, we upgraded all the wiring and plumbing and gave it a good paint and carpet throughout. We conducted weekly meetings throughout the entire process of the renovation, not only to discuss options and check we where on the right path with the design but to enable a spread out approach to the loads of decisions that go into a build/renovation. Check out the before and after images below. Along with a video of the final product. Before: After: https://www.youtube.com/watch?v=6CvHS6nNxzk&feature=youtu.be Check out the entire project here!...See MoreThe Bathroom Project of our Dreams - Before & After
Comments (2)Your client putting trust in you was the right decision! amazing transformations! Love the natural light in particular as thats a great spot for a post gym pump flex for a good selfie!...See More PRO
PROM Kelly Interiors
7 years ago PRO
PROCaldicot Kitchen & Bathroom Centre
7 years ago PRO
PROUser
7 years ago PRO
PROPeriod Property Store
7 years ago PRO
PROClifton Stone
7 years ago PRO
PROCROWDYHOUSE
7 years ago

Ocean Clarke